File Download:
Transclude of cnc-assignment-v15.f3d
This weeks assignment was to create something to be milled on the CNC machine. The only requirement for the part was it having a smoothe curve, since we should do two passes with the machine, a roughing and a finishing pass.
My Idea for the milled piece was to create something ornamental for the glass windows of my book shelve. So I wanted something that could be placed in the corners of the windows and form a whole design when the doors are closed. At first I wanted to create something more abstract but I wasn’t happy with the results so I chose to make a sunflower.
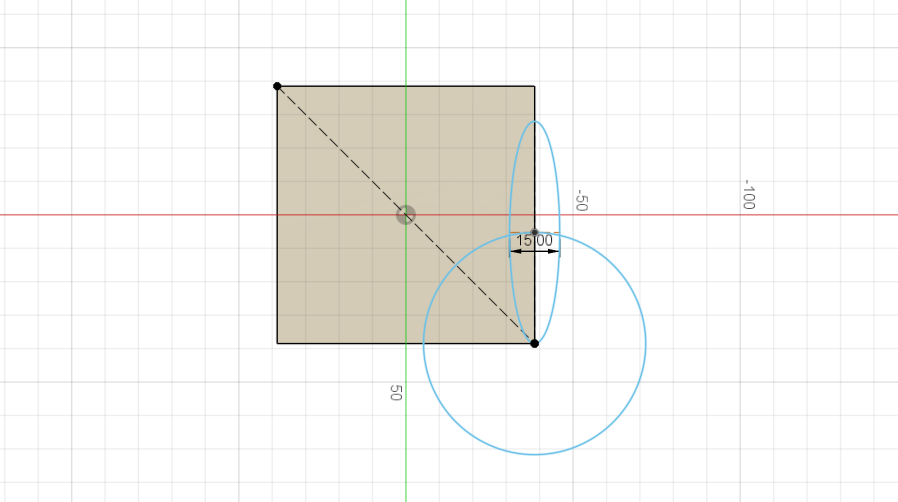
The first thing I did was create a rectangle to represent the stock material used. It is 77mm x 77mm and 37mm high since I knew that this would definitely fit into the actual stock. After that I got started on the flower. I just created a circle for the base and one leaf to replicate later.
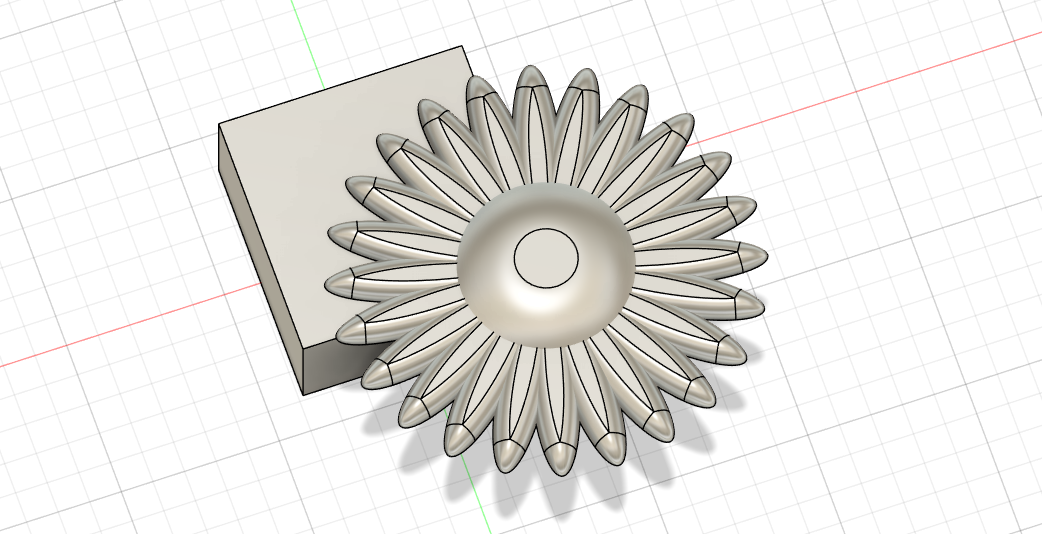
Then I used the fillet tool to smoothe the center and leaf of the sunflower and duplicated the leaf using the circular pattern tool.
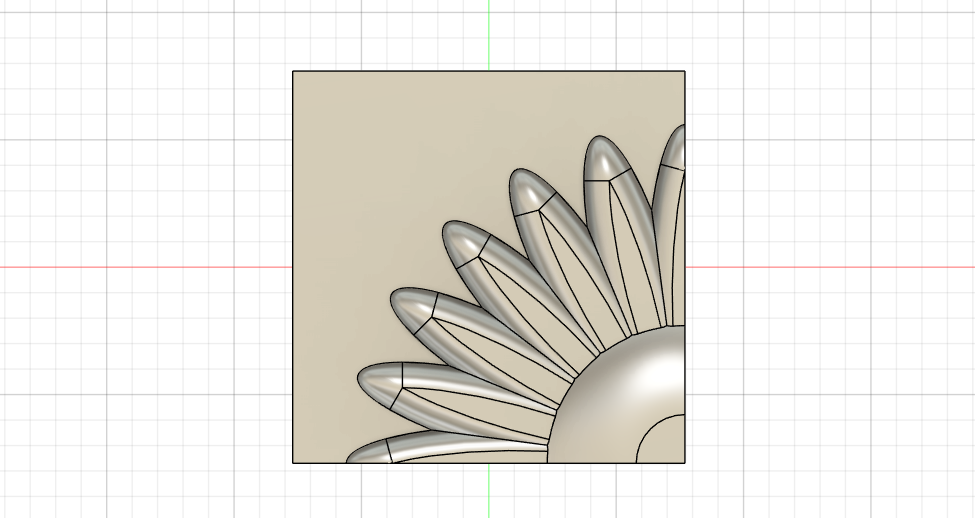
I then combined my complete sunflower with the stock piece I made earlier using the modify combine tool and choosing the intersect operation so I would only get the fourth of the sunflower that is inside the stock. At first I wanted to mill it like that but Ahmed suggested to use a contour pass (this will be explained later) which made it necessary to give the design a flat bottom. Thus i created another small rectangle right underneath the flower.
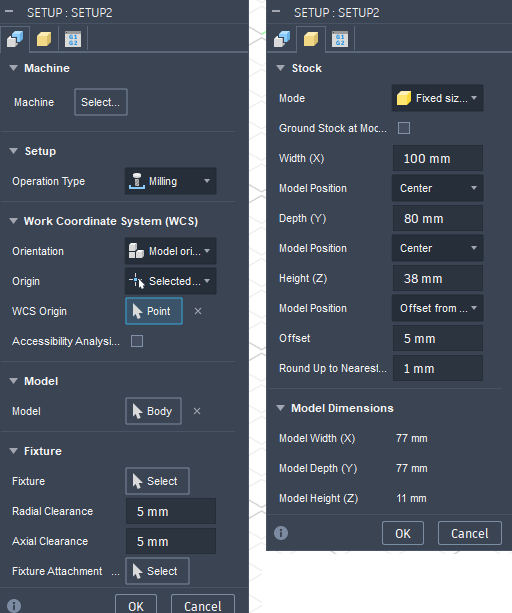
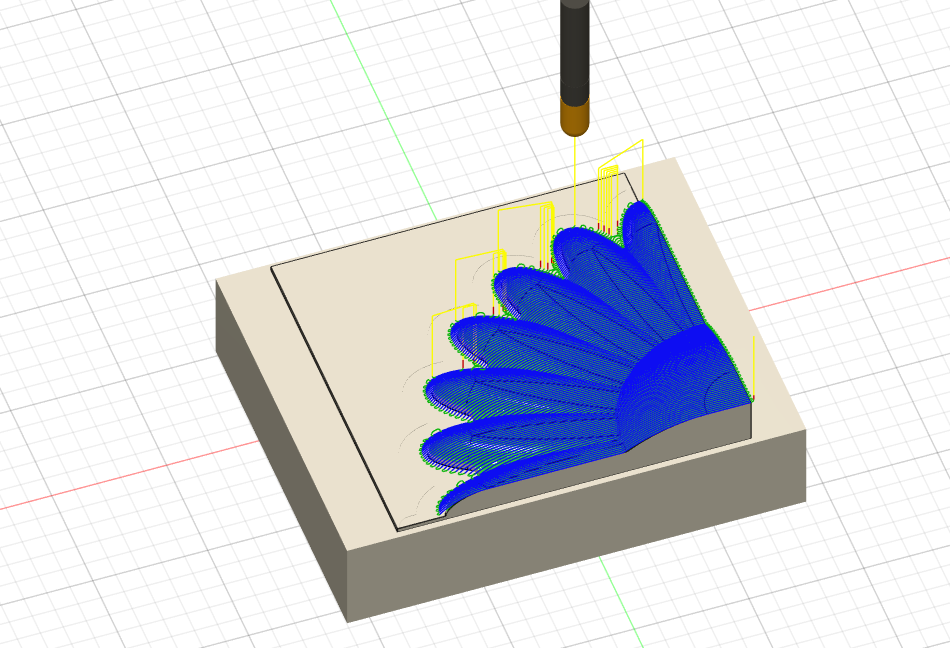
I then switch to the manufacturing mode in Fusion and created a manufacturing setup. There i specified the stock size and set the origin point for the milling operation.
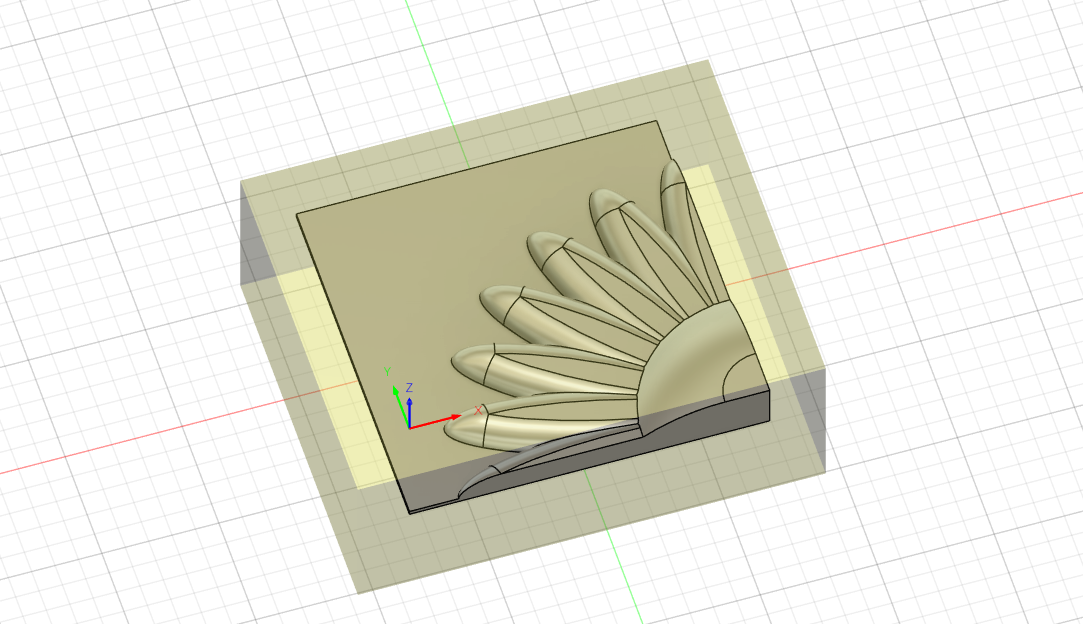
This is what the setup looks like visualized. The yellow box is the actual physical stock and the origin is set to the bottom left corner of the design.
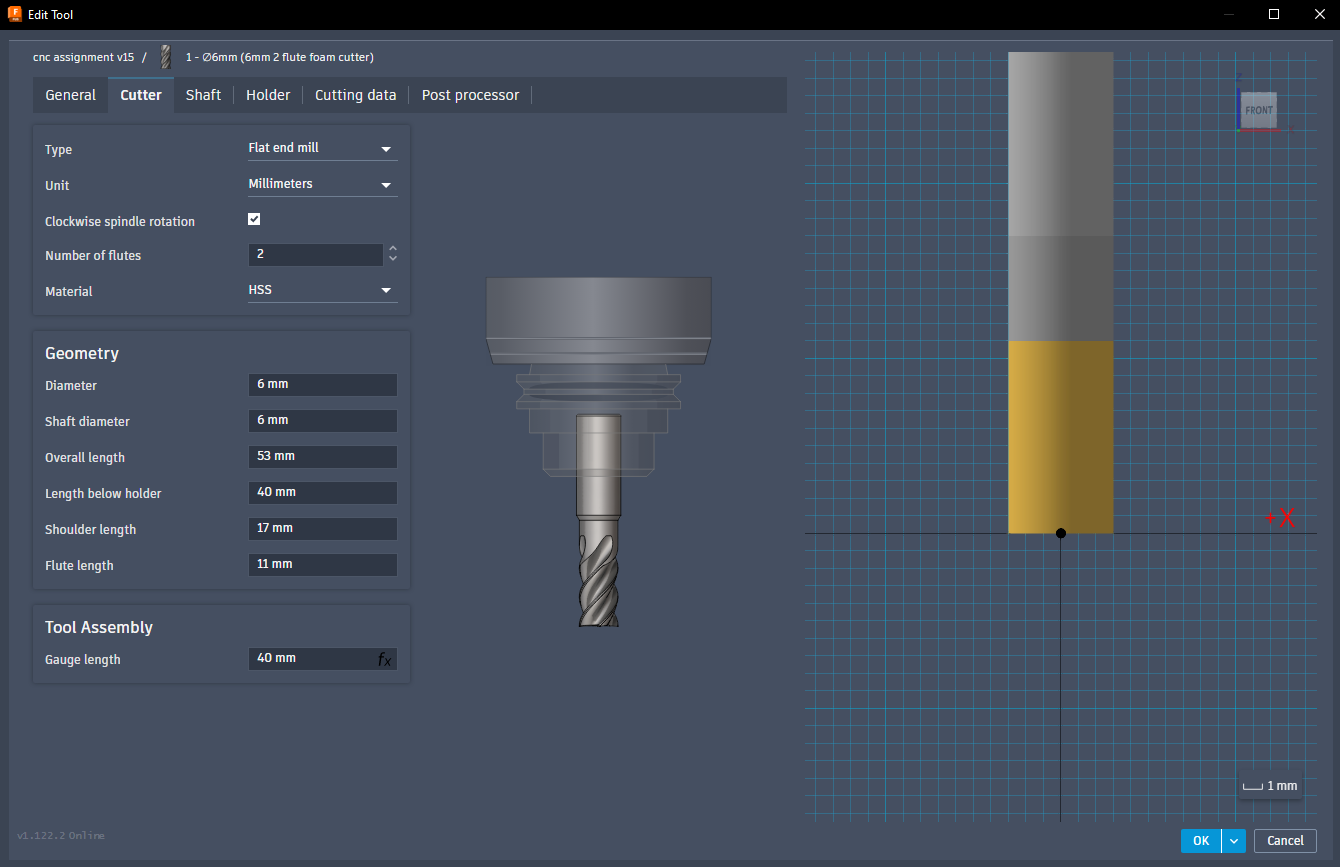
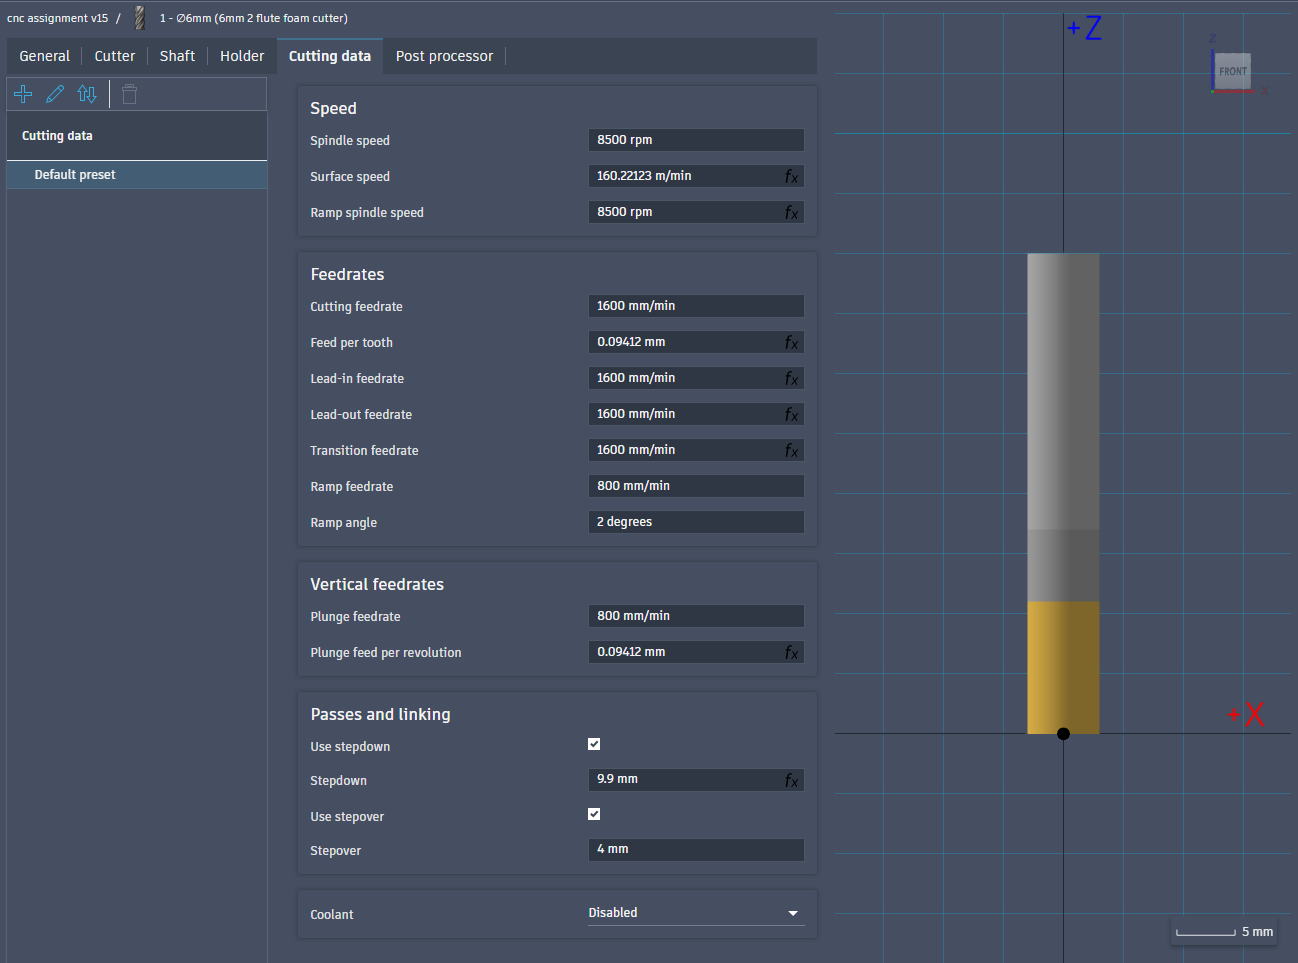
Then I had to create the two tools to use in the cutting of the piece. First I created the flat end tool, configuring it according to the actual drill bit in the lab. The cutting speed, spindle speed and stepover could be set relatively high, since I am machining my piece in foam.
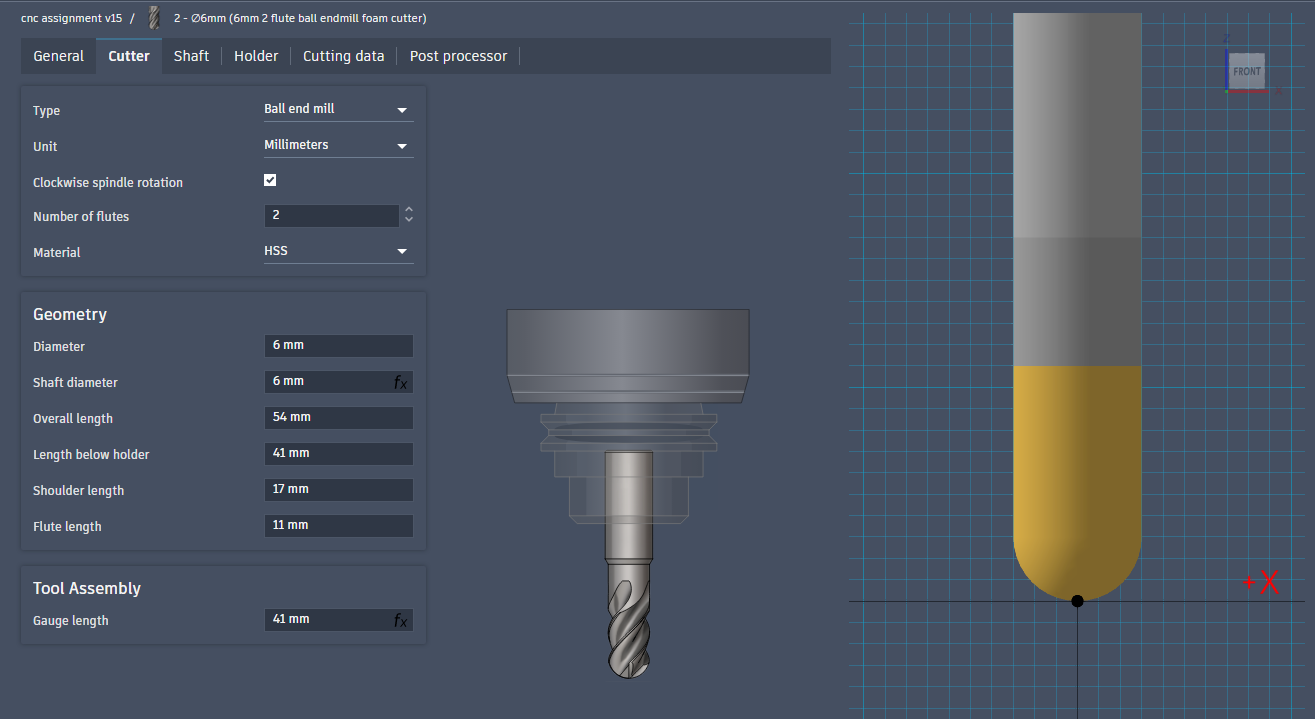

I also created another tool for the finishing pass. This one has a ball end and is configured similarly to the first.
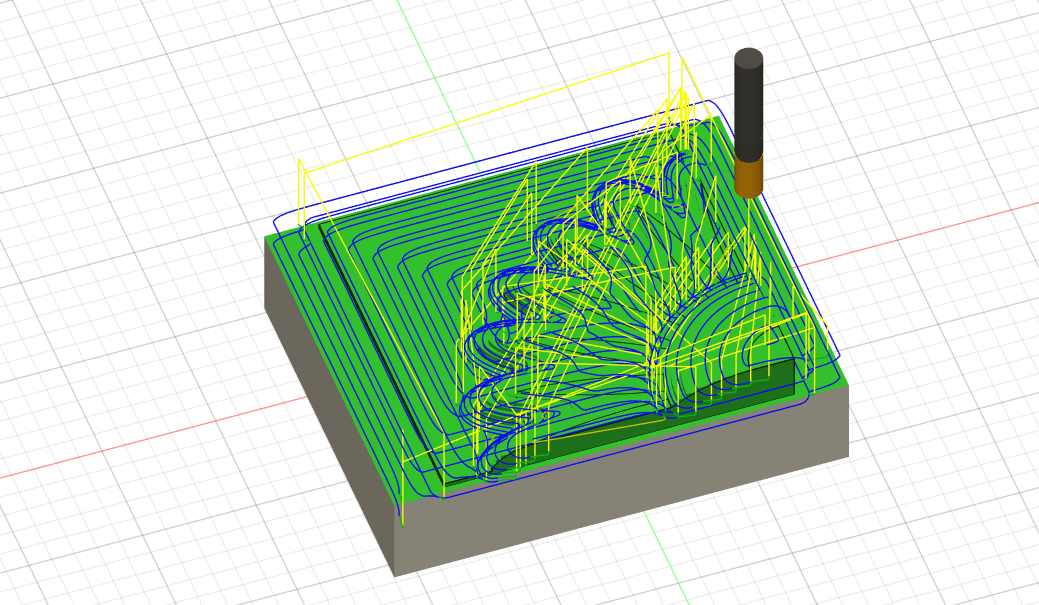
Then, having created the tools I configured the first, rough pass. For that I used the adaptive clearing operation and selected the flat endmill tool.
After that I setup a contour operation (which is the reason why I needed the base plate on my design), this also uses the flat endmill. Because these to operations use the same tool I exported them in the same NCProgram (using the Post Process action) so that I would only have to do two milling operations.
Then I created the third operation (and second pass), using the parallel milling operation. This required the ball endmill thus needing a tool change.
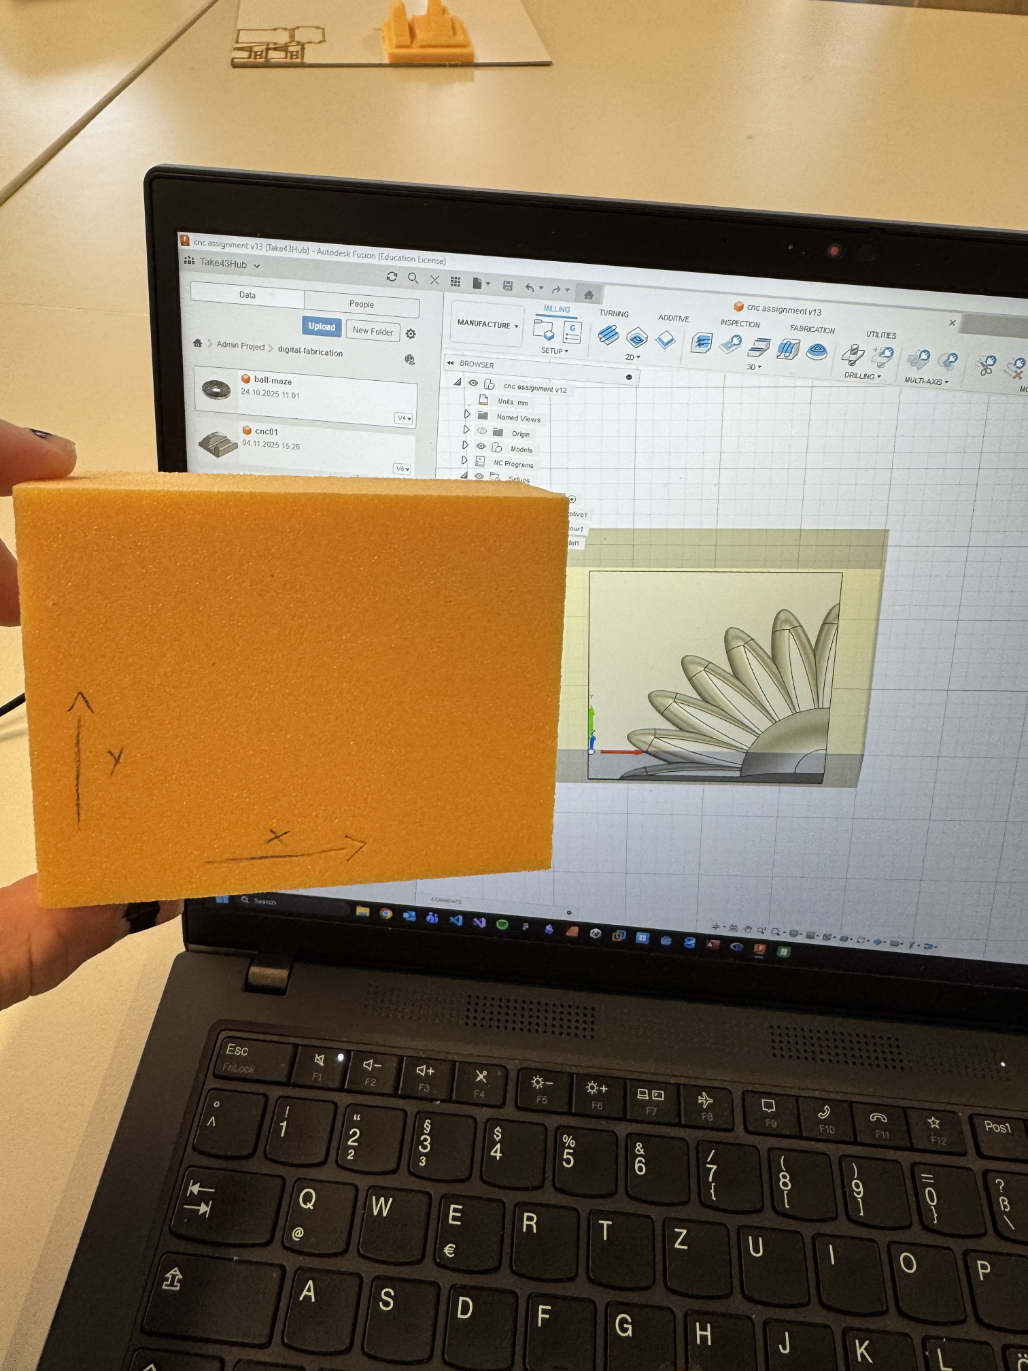
After that I got to the actual milling. I drew the axes on my stock and glued it onto an MDF plate with double sided tape. I then secured that plate with clamps and set the origin of the machine to the top left of my stock. The x and y where set by eye balling it while the z was set using the probe and then moving up the known height of the stock (this cant be eye balled because the origin has to be set again after the tool change and then the stock will not have the same height anymore).
On my first try there was a little accident with the origin. Originally I wanted to mill my piece very deep in the stock material, but while waiting for the CNC machine to be free, I decided to move it up so that I wouldn’t have to wait as long. But when moving up my piece in the stock I actually changed where the stock was position in relation to the model. But then I forgot to set the origin point again, So the machine tried to mill way to deep into the stock and actually tore the MDF plate loose. After setting the origin correctly everything worked.
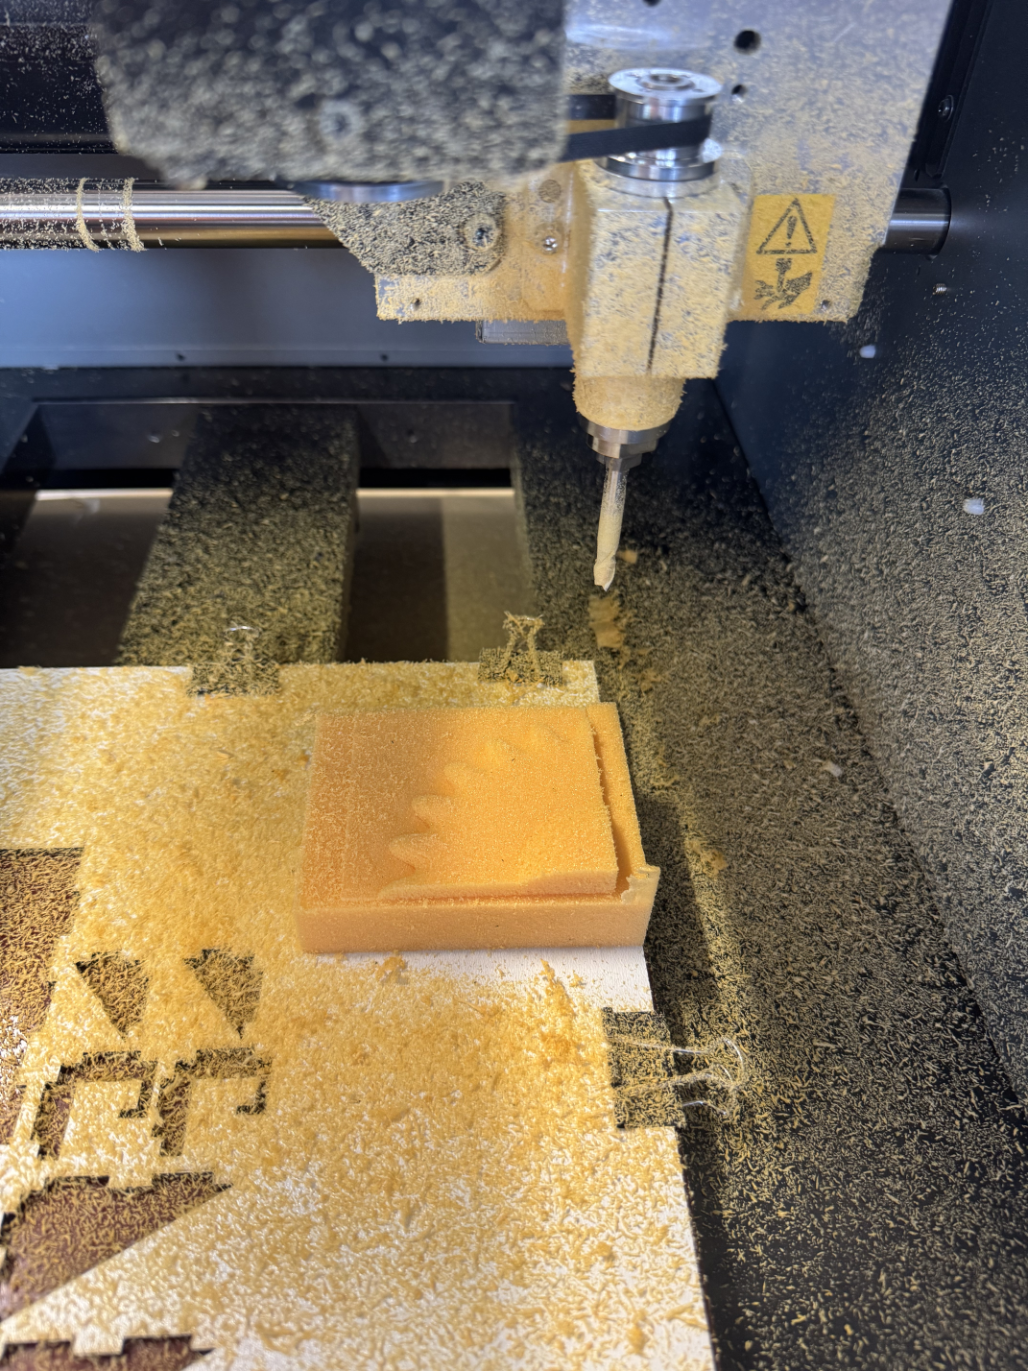
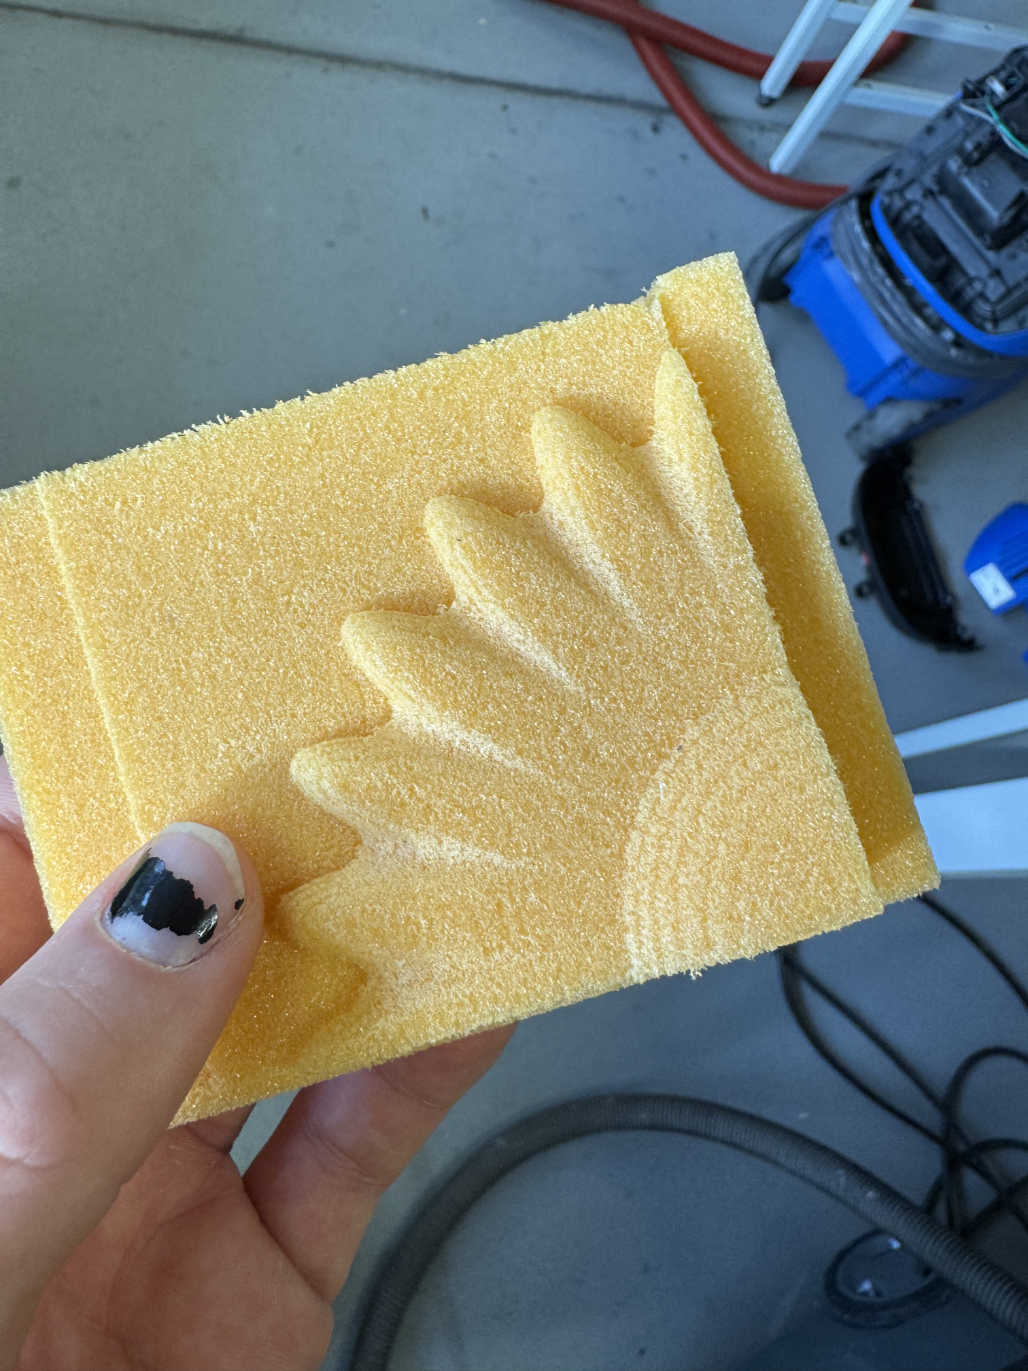
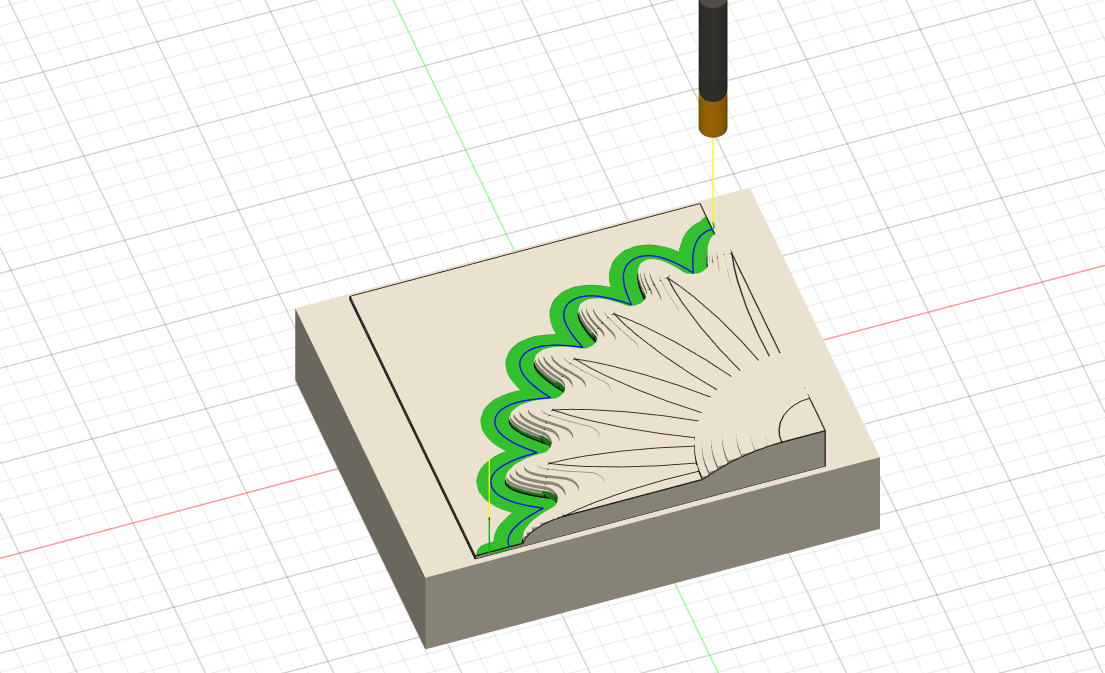
This is the result of the roughing stage (adaptive clearing + contour). After this I changed the drill bit to the ball point one.
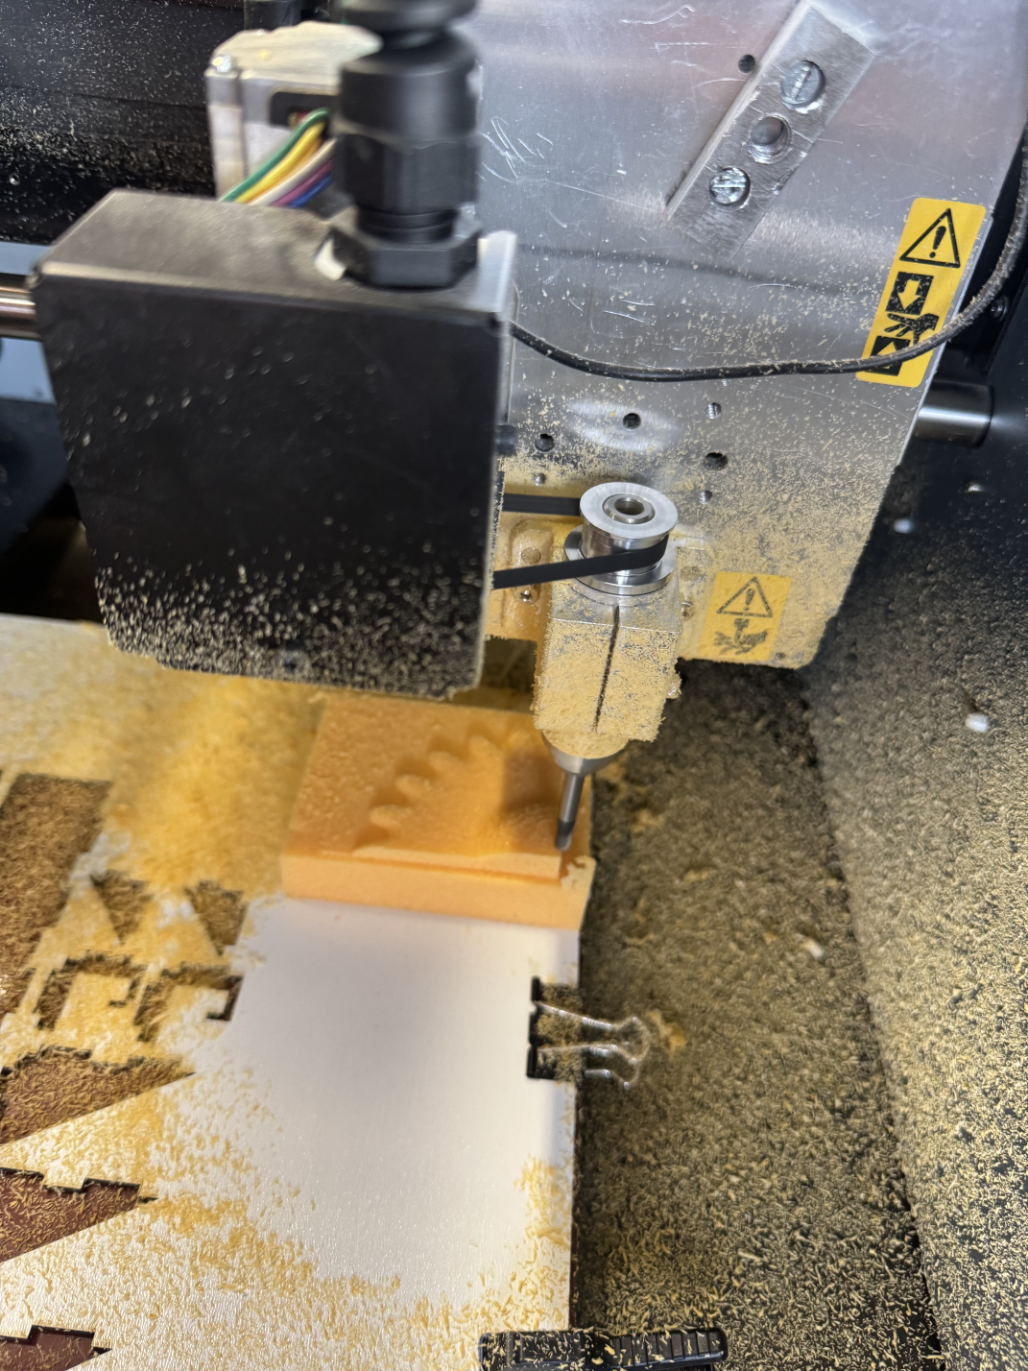
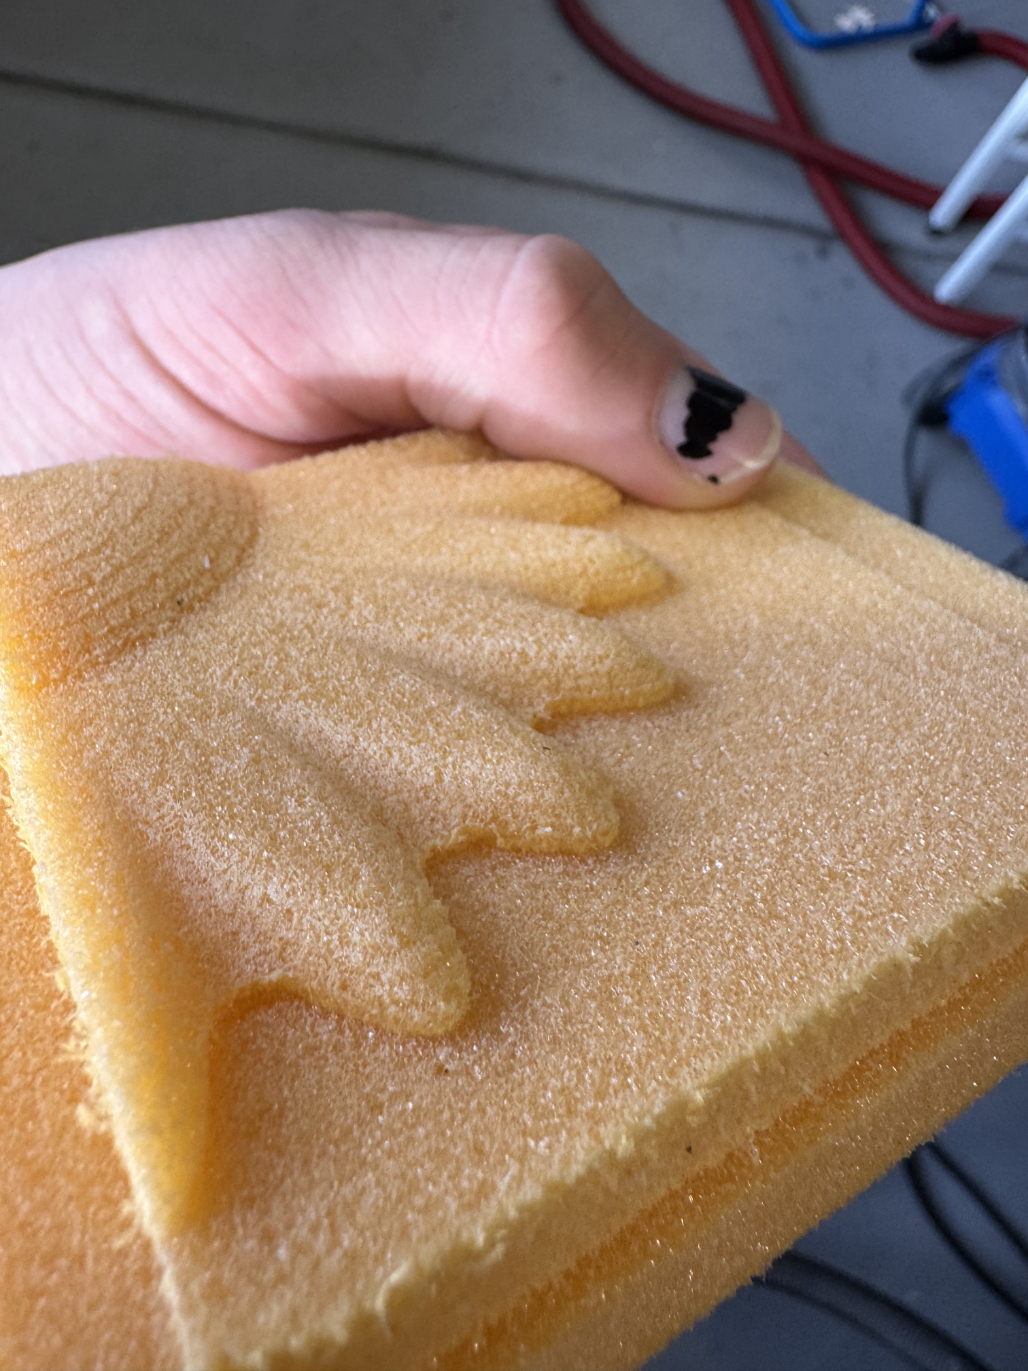
This picture was taken during the finishing stage (parallel).
This Video shows the CNC mill doing the finishing touches in parallel.
All in all everything worked out well, although I think when changing tool to the ball endmill I put it a little to far into the assembly which is why the finish isn’t as smooth as it should have been.
Here is the finished piece: